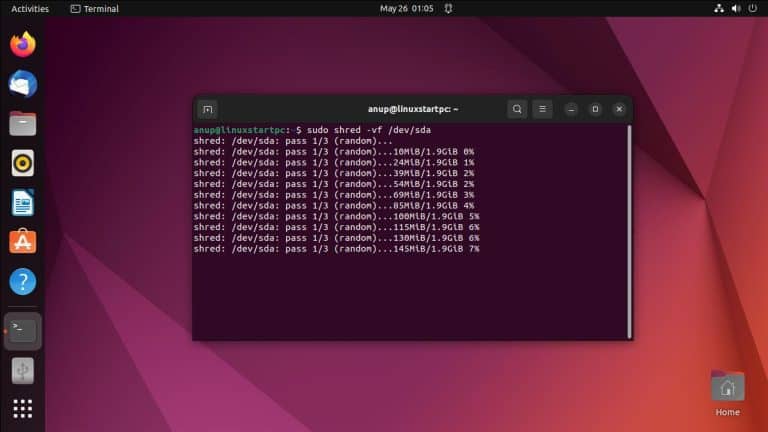
There are ‘levels’ to formatting a hard drive. If you’re trying to remove everything and restart from a clean slate, a quick format with basic tools like the Disks utility will suffice.
However, if you plan to give away or sell your HDD, you may be concerned about the formatted data being accessed using recovery tools.
In such cases, you can use a multitude of tools to overwrite the data using zeros or random numbers. With particularly sensitive data, you can even run multiple passes of overwrites just to stay on the safe side.
Format Using GNOME Disks
The GNOME Disks utility is a graphical frontend to udisks and the default GUI program for managing disks and partitions on Ubuntu.
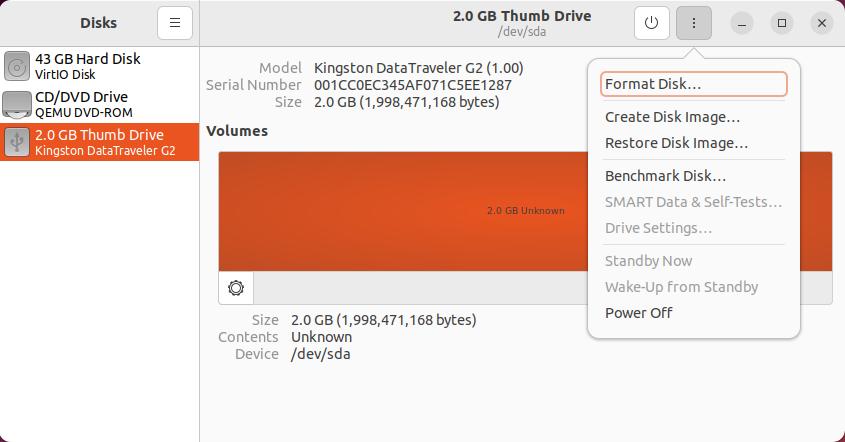
- Open the Disks utility and select the device to format from the left. Then, click on Drive Options and select Format Disk.
- Quick Format is selected by default here. If you’re going to use the drive yourself after formatting, protection measures like zero filling aren’t necessary but it’s still an option if required.
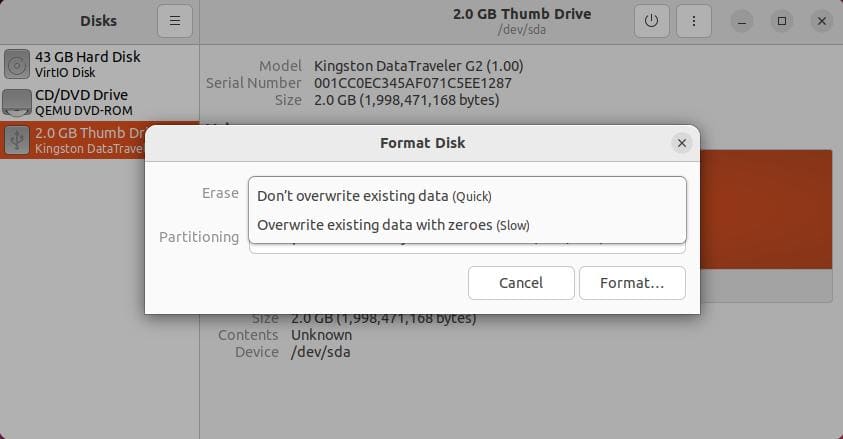
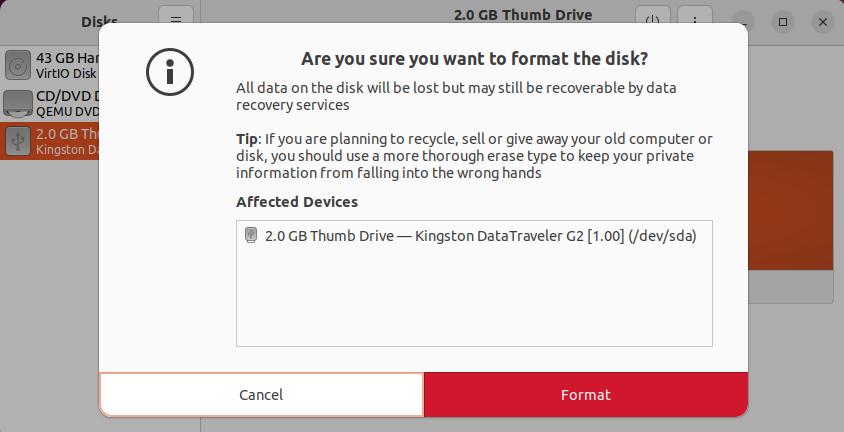
- Next, select the Partitioning Flavor and click on Format. Press Format again to proceed.
- After formatting, click on Create Partition.
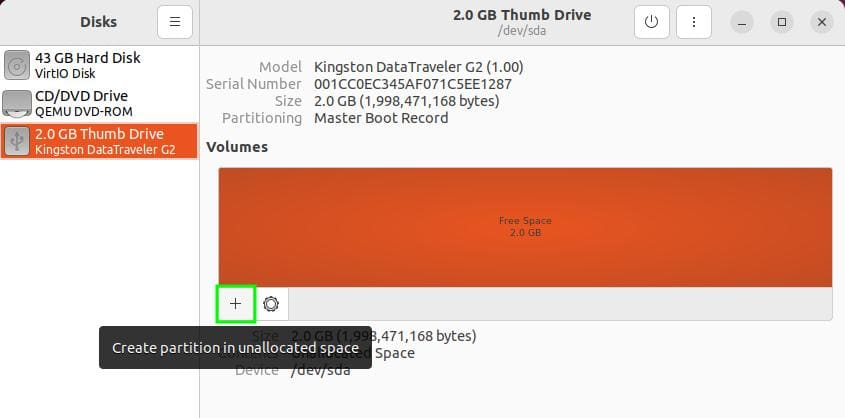
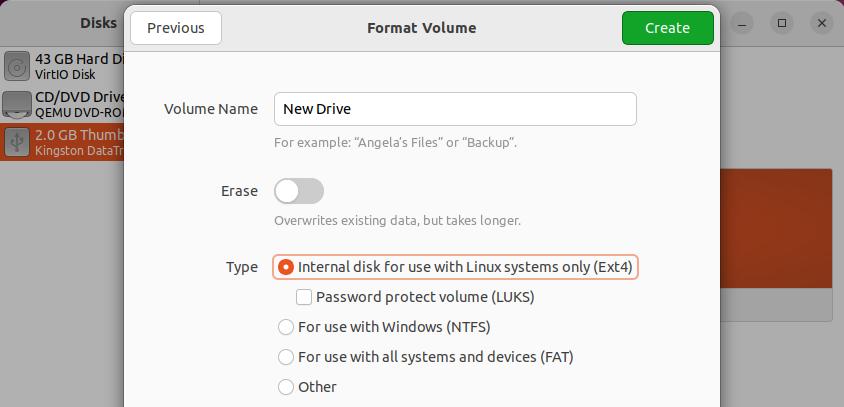
- Select the partition size and input other details like the volume name and filesystem (ext4 for Linux, FAT for cross-platform compatibility) and click on Create.
Overwrite Data with dd
dd, also called disk destroyer, is a utility for copying data from one source to another. In the context of wiping HDDs, it’s mostly used to copy null characters from the /dev/zero file to the specified device.
This overwrites the data on the target device with zeroes, making the original data almost impossible to recover for the average user.
sudo dd if=/dev/zero of=/dev/DEVICE-NAMEFirst, list the available block devices with
sudo lsblkIdentify the HDD and fill in the device name. We’ll also include a progress tracker to update us on the status.
sudo dd if=/dev/zero of=/dev/sdc1 status=progressMake sure to double-check the device name before running the command as it’s very easy to format the wrong device because of a typo.
Additionally, an even more secure method is to write random data to the drive instead of zeros.
sudo dd if=/dev/urandom of=/dev/sdc1 status=progressUse Shred
Unless you’re using expensive forensic-grade resources, the data on your HDD won’t be recoverable after using dd. However, if you don’t like dd for whatever reason (it’s a bit slow for instance), Shred is a good alternative.
It writes 3 passes of random data by default which makes the overwrite more secure compared to dd’s defaults. Like earlier, note the device name with lsblk, and double-check it!
Then use shred on the device with the verbose and force options like so
sudo shred -vf /dev/sdc1Shred has other potentially useful options too like -n to control the number of iterations or -z to add a final overwrite with zeros. You can read up on these by entering shred --help.
Scrub the Drive
Scrub, for the most part, is just more of the same. It overwrites the existing data on the disk to make sure it can’t be recovered. The reason I mentioned it here is that it also allows you to select the exact pattern to write.
sudo scrub /dev/sdc1By default, scrub uses nnsa patterns compliant with NNSA Policy Letter NAP-14.x.
But you can also choose other patterns like dod (compliant with DoD 5220.22-M), gutmann (35-pass sequence from Gutmann’s paper), random (single random pass), and so on.
For instance, to select dod, you’d specify it with the pattern option like so
sudo scrub -p dod /dev/sdc1Ultimately, all the patterns are very secure but if you want to choose the pattern yourself, scrub provides you that option. You can read the full list of supported patterns and standards on its manpage (man scrub).